Wednesday, September 29, 2010

Chalkboard paint tutorial

This is such a simple project, but i thought i'd share it with you anyway :)
A few months ago i made these little guys for hubs coffee.
And this one for buddy's treats.

And this one for my hot chocolate. 
I needed one more jar for my white chocolate hot cocoa (on the right.) So i bought another jar at Hobby Lobby today for $3 with my coupon.

This is what you will need:
-Chalkboard paint
-A jar of your choice
-Paint brush 
-Painters tape


First tape off the area that you want to be a the chalkboard.

Then start painting away! This is my first coat.

Second coat.

Third coat.

Then peel off the tape. When i did i had some get under it so i scratched it off with a razor.

There you go! 

Perfect for all my hot chocolate.

Tuesday, September 28, 2010

Front door makeover tutorial

Hey guys so i mentioned earlier about my friend 
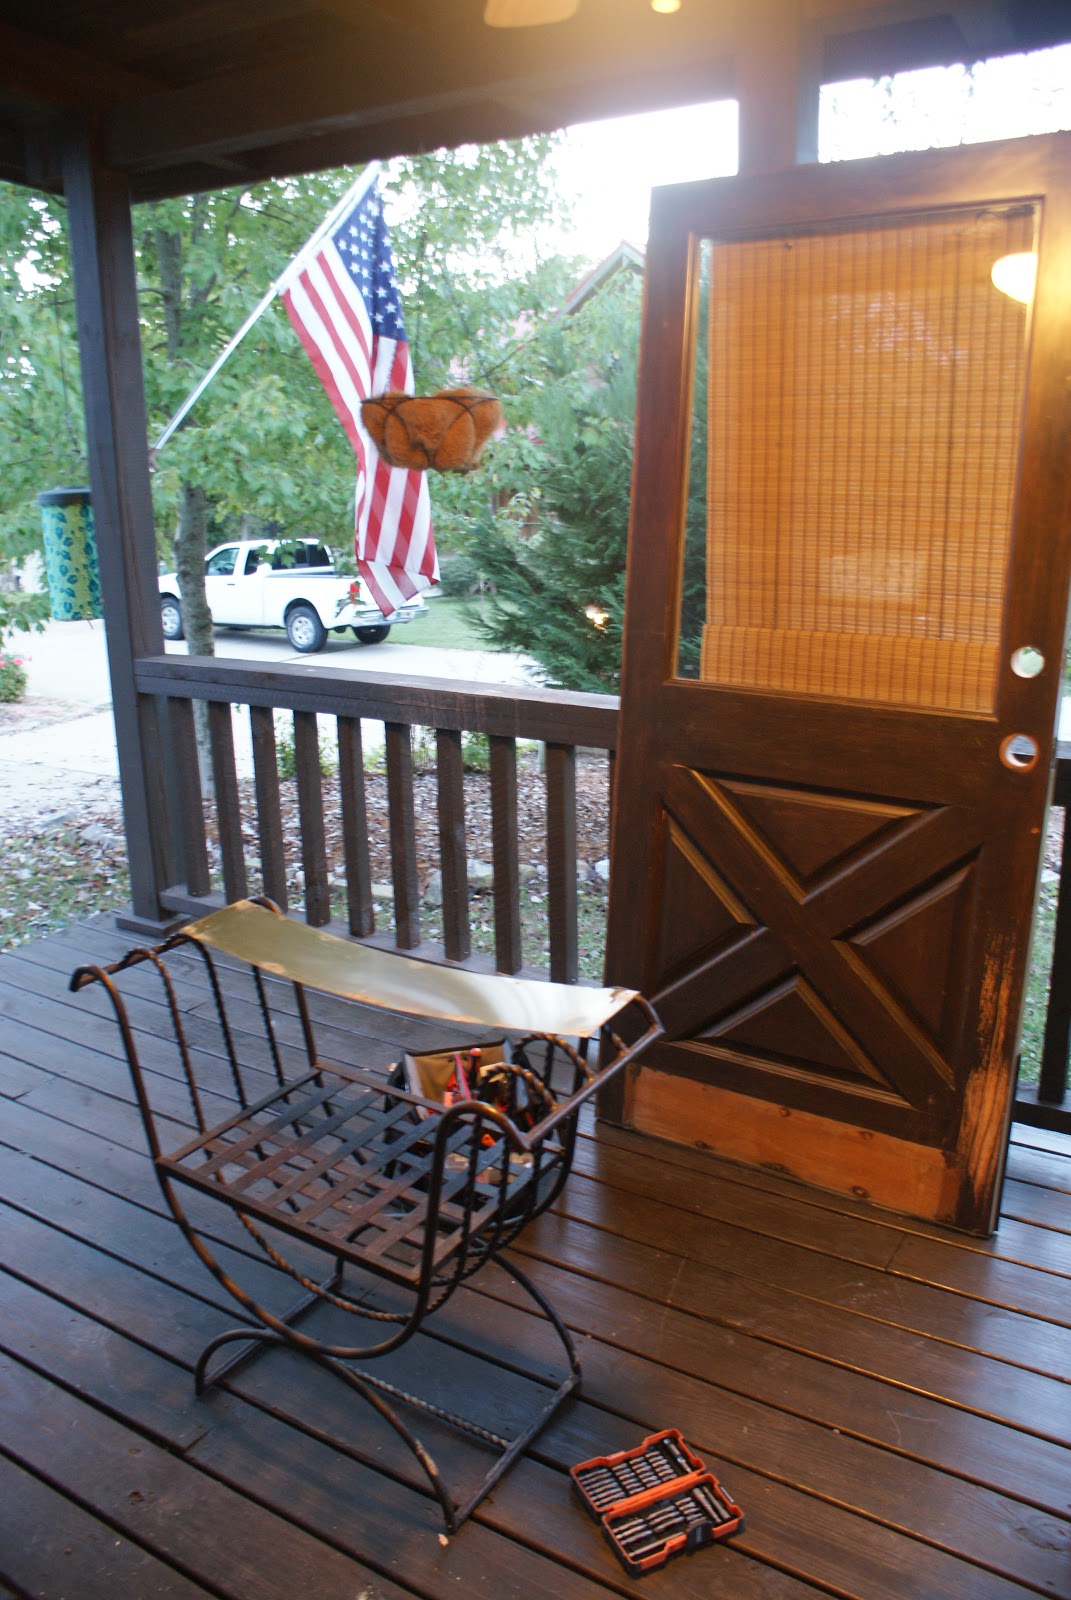
Stacy's new front door. She inspired me to jazz up our front door so here is the before and after..


And with the new screen door. I'm not to excited about the color but hubs does not want me to paint it :(  
So here goes! 
Remember i talked about a cheap way to update your hardware. Well i saw this idea over at Kara's Korner check out her blog she has some great tutorials! We spray painted our gold hardware a dark bronze color. The spray paint cost $25 and that should last us to do at least all the outside doors and hopefully all the interior doors as well. 

Here is the run down of what be bought...
-Screen door
-Hinges
-Paint 
-Spray paint
-Stain (for screen door)

First hubs sanded stickers off the screen door with an electric sander.

Then i stained the screen door

Then we removed the door

we also removed all the hinges

then hubs sanded the hinges, also with the electric sander

Hubs spray primed and painted the hardware

Here is the primed picture i forgot to get a picture of the finished hinge but we have a whole house of hinges to paint so i will get a better before and after pic when we tackle that project. 

Then we hubs sanded the door (sorry this one's kinda blurry, it started getting dark at this point...)

Then i started painting the door "lucky bamboo" by behr. well it looked like kermit barfed on our front door. so in fear of ticking off our neighbors, i ran to home depot and they kindly made it darker for me. The color it is now is closer to "amazon jungle"

Here is the difference.
Lucky Bamboo is on the left and Amazon Jungle is on the right
So much better! 

Hubs put the hardware back on

 and WALA!!

Now for the screen door. These next few pics are of the hinges we bought. Sorry for the terrible pics i had very little light.

Gate Pull $5

We got two of these 4'' T -Hinges $8

Spring $9

Inside door pull $3

Here is the project breakdown
Screen door-$20
Hinges-$25 Total 
Paint $36
Spray paint-$25
Stain-had left over from a house hubs stained

Total $106
The screen door cost $45
That sounds a lot for one door but all the paint can be used on the rest of our 4 doors. 

There you have it! Our new front door, hopefully well have the rest of the doors painted soon.  The doors we have left are the shed doors, the back porch door and our back porch door off the master. 

We are LoViNg the screen door! it is perfect for this time of year we have had the AC off the past to days and it is wonderful! Perfect for fall!


Paint, paint and more paint!

Last night hubs and i went to home depot to get paint for the outside doors on the house, what an ordeal... i'll post on that later. But look what i got!
Those are all the colors from Behr's paint and primer in one paint. (Yes ALL the colors. I stood at that paint sample booth thingy FoReVeR picking up every sample.) We love it, it's a little more expensive but so worth it. A gallon is about $35. We used the color antique white on our kitchen table.
I have seen on other blogs how people go and get the paint samples to make their own little paint book. But after we got all the samples and i saw how many there were, i realized i don't think they take every color... cause that was way too many to put on a ring. So for now they are sitting on our mantle waiting for a place in our home.

We have been wanting to paint the front, back and shed doors for a while now but when i saw my friend Stacy's blog on her "Front of the home" makeover here and here. I got really inspired to fix up the font of our house, especially for the upcoming holiday's :) So check back for a tutorial on painting outside doors and a cheap way to save money on your ugly gold hardware :)

Sunday, September 26, 2010

I need your ideas!

A few weeks ago i was driving to take hubs some lunch at work and i saw these beautiful crates sitting on the side of the road. Sometimes i feel weird about taking things out of peoples front yard when there is no "take me" or "Free" signs.  So i told hubs what house the crates were at and if he thought i  could just take them... He said yes so i grabbed them up!! 


Aren't they awesome!


So any ideas of what i should do with them?? i thought about shelves maybe but i'm open to anything! Let me know what you think!

Tuesday, September 21, 2010

Craft Room Update

Hello! So recently hubs and i got new couches! We love them. 
What did we do with the old couches you ask? Well they were both pull out couches and we need the extra guest space so we put the full size pull out in my craft room.


The twin size pull out couch is sitting in our bedroom waiting for our Yard Sale to get here so we can hopefully sell it.  

Anyway i thought i'd give you a little update on my craft room, a lot has been going on in there...

I got these new shelves, that i also mentioned in this post

and of course the new couch


you remember the filing cabinet i scored for some of my supplies.


See that bulletin board? Here is a close up.


Well i'm posting one just like it but a little smaller in the Shop.


Sunday, September 19, 2010

EYS Table Before and After

Remember this little table i got at the EYS for $5?
Well i had been wanting to paint the bottom of it for a while and i finally got around to it this weekend. 
All i used was a sanding brush and some Krylon spray paint that i had left over from the lamp project and the mirror project. I used the color Bahama Sea.

I lightly sanded down the bottom, metal part of the table. I still wanted it to have a worn look so i didn't sand too much.


Then i flipped it over and sprayed it again


Walah!


See these cute little fabric pumpins...


I've been working on them all day, stay tuned for a tutorial on how you can make them yourself or if you don't want to make them they will be in the shop hopefully soon!


LinkWithin

Related Posts Plugin for WordPress, Blogger...