Showing posts with label Furniture. Show all posts

Friday, March 25, 2011

Hutch update

Hey guys, so remember i bought this hutch a while back, seems like forever ago! Here is another update on the progress I have added pulls out of a spool of rope i got at Hobby Lobby for $1. That's right i made 6 knobs with $1 worth of rope! 
This is the rope i used, $1.99 with half off.
I moved the knobs i had on the bottom up to the top 


and replaced them with these wine corks for, that i had laying around.

I used three different knobs for the top, they are from Hobby Lobby. 

 Here is what i still have to do to finish it.
1. I need wood for the bottom shelf.
2. I also need thin plywood sheets for the back of the hutch and the bottom shelf, I'm thinking about doing the lace on the back of the hutch too.... (3.) and i need to fix the top drawer somehow. There is no actual drawer it's just the front of the drawer, we tried putting hinges on it but you could see them on the outside and they were ugly.... so i'll keep you updated on what we do with that.  And (4.) the middle door does not have glass so i'm thinking about putting chicken wire in it instead. 

Here is the before and after so far...


It doesn't look much different but i sanded and stained the whole thing and did the lace on the drawers, remember my inspiration pic...
I love hearing your suggestions so if you have any ideas let me know!

Thursday, February 17, 2011

slowly but surely

I know my posts have been less wordy than usual but life has been so crazy lately!  I haven't finished the hutch yet but here is the in-between-stage.
I sanded the whole thing down, stained her and painted the drawers to look like lace. Once i finish the whole thing i'll do a tutorial on the lace thing, it's super easy!
I still need two knobs for the top and a piece of glass or possibly chicken wire for the middle door.
The top drawer is not really a drawer it's just the front of the drawer so we are going to put a latch on it so that it folds down. I also need to get handles for the drawers
isn't the lace pretty!
I also need to get a piece of wood to go on the bottom shelf. I had to rip it out along with the entire back of the hutch because of mold. ew. 
Hopefully i can get this baby done soon, she is already so beautiful can't wait to see her when she's done!

Wednesday, February 9, 2011

Shelvuary

yes i just made up a word, Shelvuary, meaning this post is mostly about shelves and it is February. don't hate, i'm running out of blog titles, already! No on to the shelves, I changed up my living room a bit, can you tell what i did...
The shelf above the door used to look like this,
But i started using the jars in other places around the house and after a while there were only four left and it started to look a little lonely up there so i added a few things i found around the house.
I also hung the mirror i found last weekend.
Joon it's still yours i'm just putting it to use until i pass it on to you :)
In other news my sweet husband made me some shelves for my closet in the craft room. And he did it for FREE!!
He looks mad there but he's not he's just trying to make a weird face...typical
anyway back to the shelves.  I have been wanting shelves in the closet to store my craft stuff and since i bought the hutch i needed the extra storage because it holds a lot less stuff than my bookshelves did. So we went to home depot to get wood and when we priced it out it was going to cost us $70 for the wood. Are. You. Kidding. Me. Y'all know how cheap i am and that, that is just too much to spend on shelves. So my husband being the amazingly, smart, cheap, frugal, and handy man that he is, went over to the empty lot by our house and picked up some free wood for us to use for the shelves. They were a little wet so we let them dry for a few days and... Wa La!
Perfect new shelves for FREE and the natural wood is gorgeous and matches our trim perfectly. So here she is all loaded up with my goodies!
It holds EVERYTHING! but i kept a few things out to store in the hutch. Which by the way is coming along nicely.
I know it doesn't LOOK like it's moving along, but i got the whole thing cleaned and sanded. 
And i found my inspiration for it....this dresser is from Kara Paslay Designs. 
So all i have left to do is stain the piece and do the lace on the drawers and shelves.
I can't wait, and of course i'll keep you posted :)

Saturday, February 5, 2011

This hutch is clutch

Here is the hutch i found at the thrift store today. The guy was asking $30 for it and i asked if he could take any less and he said can take $25. So me being as cheap as i am asked if he would take $20. He didn't. But $25 is still a steal! 

I am starting to collect all different knobs for it.


I think i am going to stain it but i may paint it white. What do you think?

Tuesday, February 1, 2011

Thrifting 2.1.11

Dilema dilema. So i took a trip to thrift store (i hadn't been in WEEKS, i know crazy.) I found an incredible deal! but let me back up. I have been looking for a cabinet/hutch for this space.
As you can see i need a very narrow cabinet/hutch. I want to make this into a coffee bar area where we can put all the hubs coffee stuff, his coffee pot, french press, drip and espresso machine. And store the coffee and all the little things that go with it.
So while i was at the thrift store today i spotted this little lady.
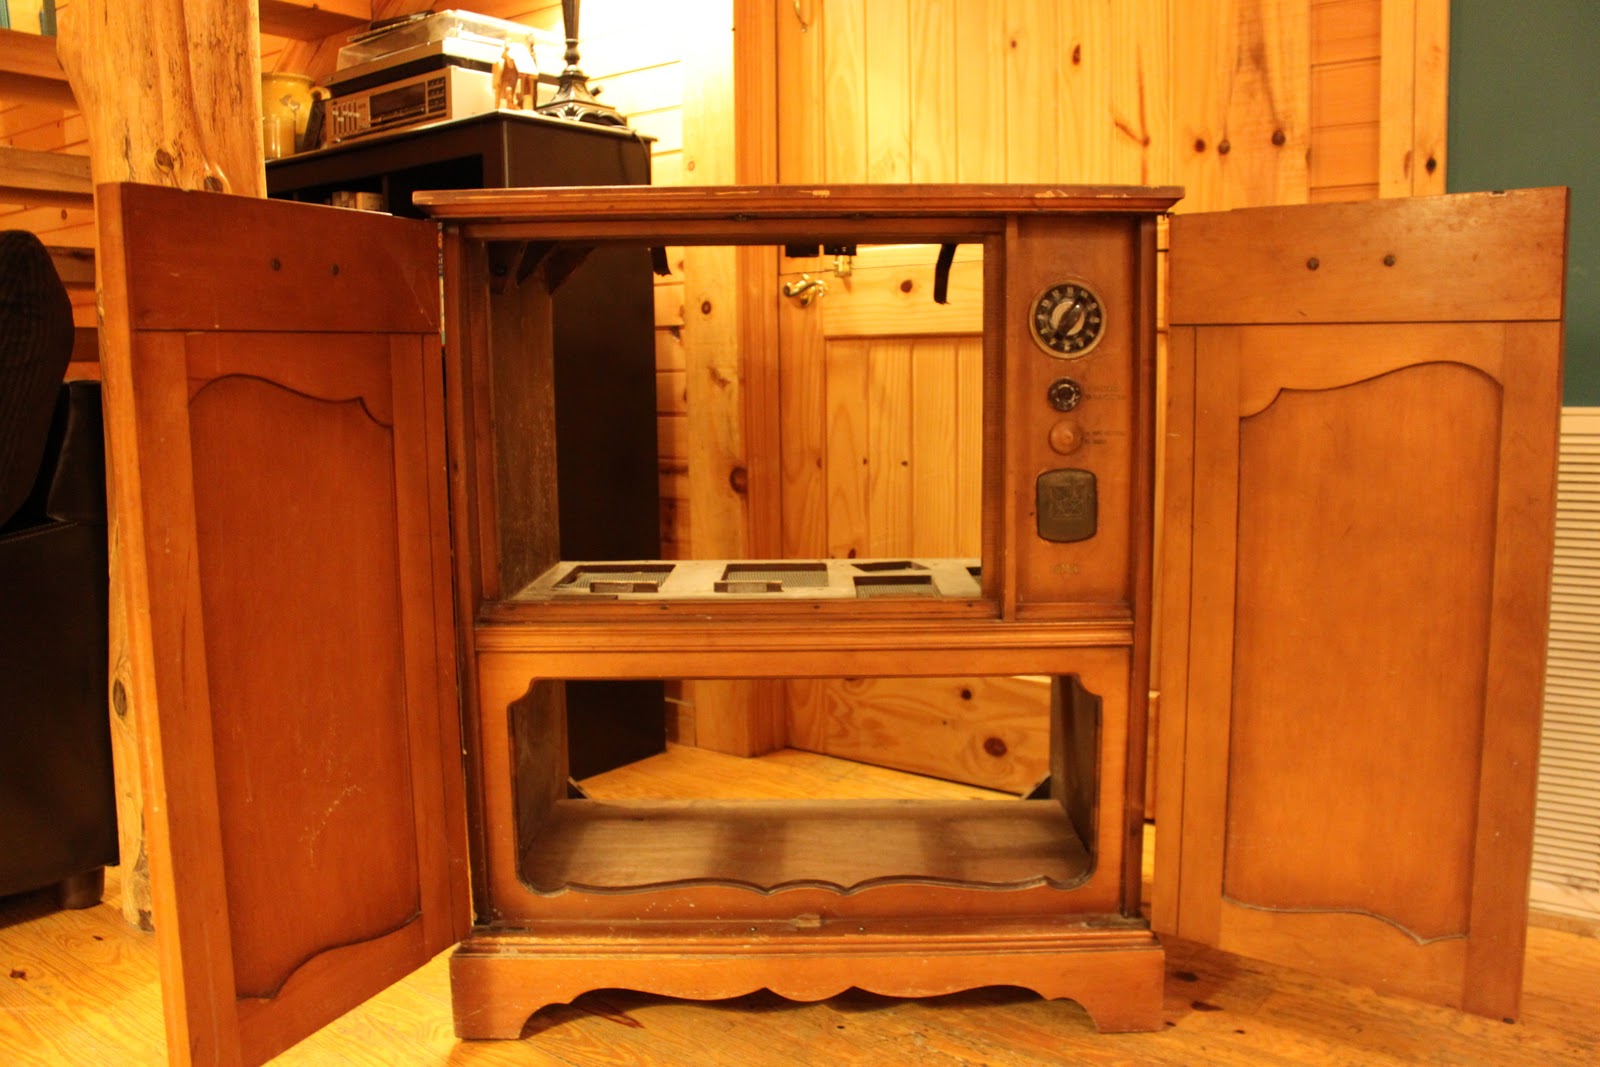
It's an old tv cabinet.
But i didn't realize how deep she was until i got home. 
You see, i was blinded by her price tag. $25 with 70% off. I'll do the math for ya. 
$7 bucks!!
At that point all common sense went out the window.
I grabbed the bottom half of the tag and headed for the register. 
When i got her home i realized she is way too wide for our kitchen :( so sad. 
So i tried her out in our guest room
How does she look? 
The antique wash stand that i had there is my mothers, i was just borrowing it until i found something else. 
Here is another angle.
I may decide to sell her but for now i think i'll leave her right there. 
Because i'm SO in love with her!
Here are some close up pics. I've got some big plans for her!
The top will be sanded and stained. I'm gonna paint the bottom Flagstone Grey. The same color i painted the sewing table and craft room. And i'm going to sand it down A LOT so you can see a lot of natural wood through the grey. Kinda like i did the recycled table. Then i'm going to apply a clear poly to the top.
On the inside i'm gonna paint it the same grey color.
But i'm gonna leave this little knob area the way it is.
I'm gonna paint the inside of the curve of the door with chalk board paint.
I am in LOVE with these curves. I'm thinkin a basket on the bottom to hold towels or extra blankets.
So how do you think it looks in the guest room? I need your help. 
I will be back with after pictures soon!

Sunday, January 23, 2011

Vanity before and after

Hey guys i finally finished the vanity i've been working on.
Here is the before picture


I have no where to put it so I need to sell it so if you or someone you know is interested let me know!
LinkWithin

Related Posts Plugin for WordPress, Blogger...