Showing posts with label Tutorials. Show all posts

Tuesday, January 4, 2011

Coffee Table and Desk Makeover and a friends giveaway!

Hello there and happy Tuesday. Only 4 more days until half price day at Goodwill. I am so excited...I'm sure you are too :)
I wanted to show y'all how i painted the Coffee Table and Desk. I did the same technique on both so i'll here is what i did.
Step 1.
Sand- I used a belt sander, cause that's all we had and just did a light sand over the whole piece.
Step 2
Prime-I used Zinsser Stain cover primer. It is good for multiple surfaces since the desk is veneer, the coffee and sewing table are wood and i think the vanity is wood as well i thought it was best to get one primer that would do the job for all my projects. The other reason i picked the stain cover is because i have been working on these crates i made. I haven't posted about htem yet because i'm not 100% in love with them yet. I started with a stain and tried to paint over it. DON'T DO THIS. You can't paint over stain it make it look funny. So i bought a primer that covers stain so i could repaint them. Hopefully i will be back with a Crate post soon.
Step3
Paint-After the primer dried i used a roller brush to paint (the top of the coffee table and the entire desk). I did 2 coats.
Step 4
Stain- Since the hubs stains/paints houses he comes home with extra stain so i use it on my projects. The stain just deepens the color and give it a protective layer. I did this on my blue table as well.You can find that post here. When i stained it i just brushed a layer of stain on the surface (for example the side of the table, if you are doing a large surface break it into sections) the wipe it off with a old towel. For the desk i used a light golden stain. I did a test with the dark stain (that i used for the coffee table) and even when i wiped it off it made the desk way too dark. Since i painted the coffee table brown i used a dark stain on it.
We eat, play cards, do crafts, etc at our coffee table so the stain really helps protect the wood.
This is what it should look like when you brush the stain on.
This is what it looks like when you wipe it off. 
     It's a little bit hard to tell but it shouldn't change the color too much just deepen in a little.
     You can stain over paint but you cannot paint over stain...I wish i had a cute little saying to go with this but i can't think of one, if you do let me know :)
     If you are wanting to paint a piece of furniture i would recommend going to the oops paint section of your Home Depot, Lowes, or Walmart. They have great prices and some really good colors!


Here is the project breakdown:
Desk-$25
Primer-$18 (i used it on both projects and didn't even make a dent!)
Paint-Left over from Guest Room (Wall Color)
Stain-Left over from a house the hubs stained
I kept the same knobs, and didn't even paint them. Usually i will spray paint them but it has been so cold outside lately and especially metal you can't paint in the cold so for now they are staying the way they are...
Total to makeover the Desk=$43
Before
After
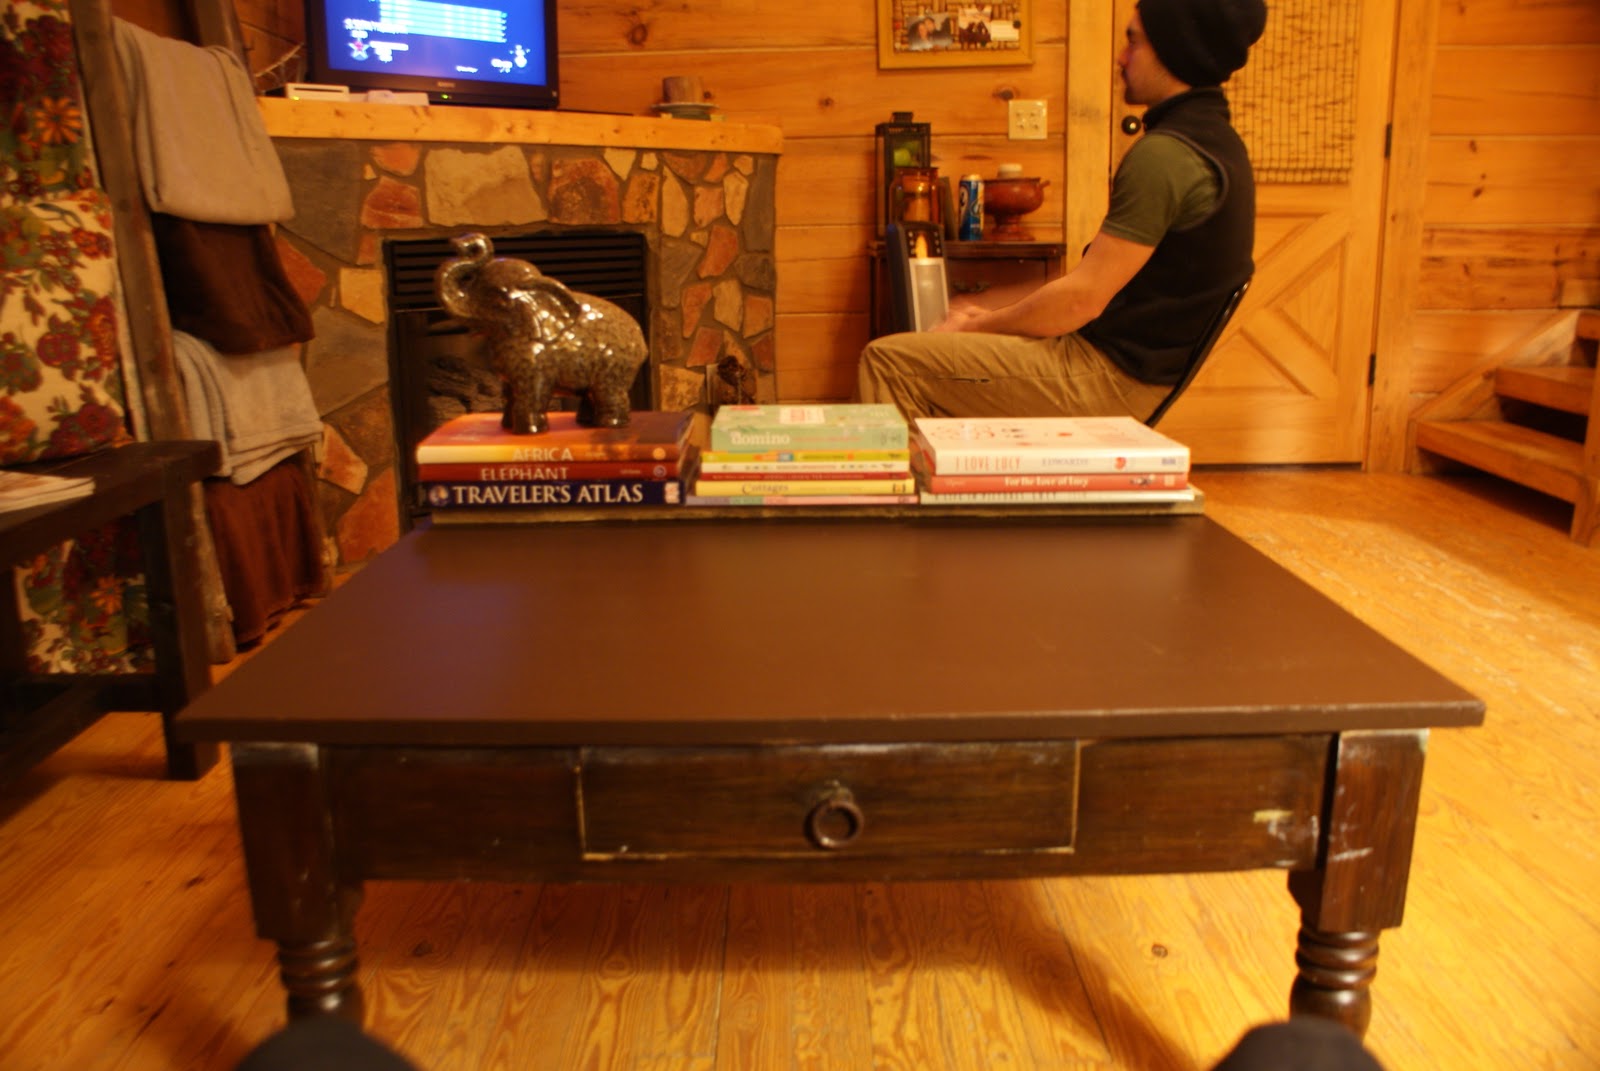
Coffee Table-Had in the garage
Primer-from desk project
Paint-oops paint $2.50
Stain-Left over from a house the hubs stained
Total to makeover the Coffee Table=$2.50
Before
After
So there you have it, if you have any questions about painting furniture let me know, i'm no expert i've just learned through trial and error. But i'd be happy to help you out as best i can!


Also, Joon over at The Adventures of Ordy and Joon is doing a giveaway of her favorite things. And let me tell you she's got some really good favorite things! She blogs about everything from home decor to fashion to baking and how to make yourself pretty :)  Check out her adorable blog and don't forget to become a follower and enter her giveaway!


Saturday, December 4, 2010

5 Thrifty ways to decorate for the holidays

Are you having trouble coming up with new ideas this Christmas and can't spend the big bucks? Here are a few inexpensive/free ways to decorate for the holidays on the cheap!

1. Use things you have. Shop around your house looking for Christmas colors, which now a days can be any color. Do you have a red candle stick, an old frame you can change out the the background with some Christmas scrapbook paper? 
*Side Note-Remember this memo board i made a few months ago?
Well i wiped off the dry erase marker, cut some Christmas scrapbook paper to fit the frame and put some Christmas pictures in from when i worked for Santa at the mall :) o the good ole days!

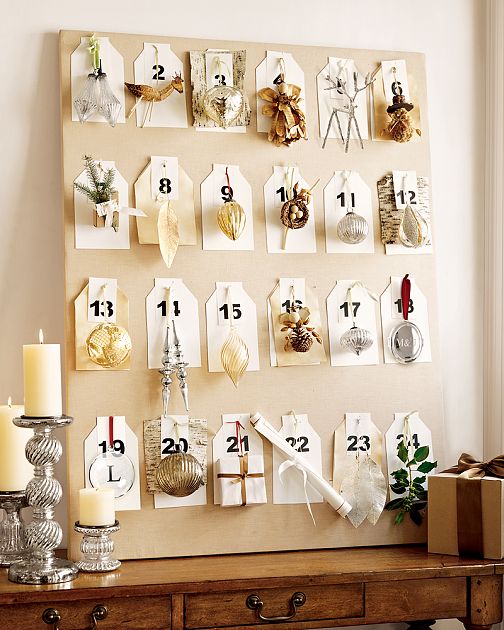
2.  Don't feel like you have to buy specific Christmas decorations. I only have a few things that are Santa or snowmen or Christmas related, most things i just update for the season. Like our Pottery Barn knock off Advent Calendar and Christmas tray.

3. Invest in your Christmas decor. Buy things you can reuse next year. 2 years ago i bought 10 boxes of icicle lights at Target at 90% off so i got ten boxes for $10 bucks.
 Last year we had this little guy as our Christmas tree he was $4 and i added some red berries and lights. This year he is in our guest bathroom for all you guys to enjoy!
 We also bought an artificial Christmas tree at the end of the season last year for $15. 
This year i bought 4 green wreaths to put on our outside windows. They were $8 each with 50% off so the total was $16. And i will definitly reuse them.

4. Shop your Thrift and $1 Store. You know i love love love the thrift store with all the junk i have turned into treasure. So look for things you can make Christmas(y). I have also found some great things at the $1 Store this year they had plastic ornaments in tubes of 12-15 for $1 each! i bought a bunch of red ones to use on our tree and maybe spend $5 bucks. I also put some in one of my mason jars to give the bathroom some yuletide.


I also made the Hurricane's with materials from the $1 Store. They only cost $4!!
they go up here
And for Christmas your could do this.
Or put a candle in it and fill it with bells, or acorns or feathers or sticks. Anything really!
I bought the bottom half, the candle stick and the top, the vase separate and hot glued them together. It was so easy and CHEAP!
They would look great on a table or mantle and you could buy different sizes and make a 3 or 4. So many options :)

5. Use things from the great outdoors. Pinecones are my favorite cause they are great for Fall and Christmas decoration. Even if you like the silver and white look you can spray paint the pinecones with fake snow or white or silver spray paint. You can also go to your local tree lot and they will give you their evergreen scraps for free. They make your house smell amazing and look so pretty on your mantle or tied along the banister.

Happy decorating and i'd love to hear how you are decorating for Christmas!


Monday, November 22, 2010

Advent Calendar

Remember in my Christmas Inspiration post I shared with you this advent calendar i loved.

well i tried to make one myself here is how it turned out.
Starting December 1st we will put the ornaments on the little black tree that is sitting on the table!


Here's how i did it, it was super easy and cheap! 
You will need:
Bulletin Board
Linen fabric
white scrapbook paper
25 ornaments
25 stick pins 

I used the bulletin board i had in my craft room as my inspiration board.
But if you don't have a bulletin board already all you have to do is lay the fabric on the ground (the side you want showing to the floor) lay the board on top of it and pull the fabric tight and staple it on the back.


Then cut out 25 tags and numbers, I printed mine on the computer but you can hand write yours if you have pretty handwritting. Then i attached the tag and the number to the board with stick pins. Ya know the ones you use for sewing.
Then just hang your ornaments on the stick pins. This was the hardest part for me. We only had a few from Christmas last year so i have found quite a few from  for $1 at Walmart and Target.


Bulletin Board=already had (I found it at the thrift store for $1.50)
Linen fabric-already had (Hobby Lobby 1/2 yard=$3 don't forget your 40% coupon)
white scrapbook paper = Already had, got out of a scrapbook i bought a while back, you could use printer paper too.
Numbers=Print off the computer
25 ornaments=i have spent $6 so far and i still need 6 more
25 stick pins=already had from sewing crafts

I spent $6

If you needed all the supplies (except the ornaments) it would cost you less than $10.

Tonight is your last chance to enter my CSN giveaway! Right now your chances to win are REALLY GOOD only 9 people have entered :)


Wednesday, November 10, 2010

Frame to tray tutorial

I am sitting here drinking the best hot chocolate i have ever tasted. My secret, french vanilla creamer. I decided i wanted to start drinking coffee when it got cold so i bought the sweetest coffee i could find. French Vanilla coffee and french vanilla creamer. I'm not much of a coffee person. But i have loved hot chocolate so much this season that i haven't gotten to the coffee. Long story short, i had french vanilla creamer sitting in my fridge and didn't want it to go to waste.  Mmmmm makes hot chocolate delicious!!
Anyway onto my new Christmas Tray. Yes i said Christmas. As i mentioned in this post Robby and i are decorating for Christmas this weekend. So i have been doing a few little things before hand. I found this frame today at the thrift store and thought it would make a great tray.
Sorry for the "middle" picture. I got home from work with only a few minutes of light to spare so i dove into my spray painting. I also spray painted this 
but i'll get to that later. 
Here is another "middle" picture. Basically it was a gold frame and i painted it red.
After i painted it i found some scrapbook paper. Put it behind the glass and put the frame back together. 
I painted it red cause i can just change out the paper for Valentines day, Fourth of July and Thanksgiving. I love red!
The total cost of the project $1.50
I had the spray paint and scrapbook paper from other projects. 

Friday, October 15, 2010

Leaf Banner Tutorial

Hey guys i'm back with some more free decorations! This is the window before.
Sorry this pic is so blurry.
I got these leaves when hubs and i went hikng a few weeks ago. i stuck them in a book to flatten them out. 
We went hiking up lookout point and had a beautiful view of Chatty!            
I measured how long i wanted my banner to be. Then i laid my leaves out and put the ribbon on top of them. You could also use, hemp, string, or yarn.
I duct taped the leaves to the ribbon.
To attach it to the window i just rolled the duct tape to make it sticky on both sides.
There you go a free, recycled, fall banner!


I also used the white pillar i got at the thrift store last week on the mantle, holding the fabric pumpkin.

Wednesday, October 6, 2010

Fall Wreath

I wanted to spruce up my front door with a wreath. I bought one at the thrift store a few months back for $1.50. Since i'm trying to save all the money i can lately i looked for ribbon and fabric i already had.I used burlap that we had left over from the center pieces at our wedding and some ribbon i had left over from the bouquets in our wedding, the orange ribbon i had in my scrapbooking stuff.
The burlap comes in roles at Michaels for $3.99. From what i had left over i just cut them about 6-7 inch pieces and rolled them up to look like a flower. Then i stuck them in the wreath. I didn't even need to glue them down. Then i tied the orange and sheer ribbon inbetween them to fill in the gaps. I would have liked it to be a little fuller but that's all i had to work with :)
Here is the finished project.
Here is a picture of the process... i took me a while to figure out what exactly i was going to do!
Have you made any wreaths lately please share! I love getting new ideas!

Wednesday, September 29, 2010

Chalkboard paint tutorial

This is such a simple project, but i thought i'd share it with you anyway :)
A few months ago i made these little guys for hubs coffee.
And this one for buddy's treats.

And this one for my hot chocolate. 
I needed one more jar for my white chocolate hot cocoa (on the right.) So i bought another jar at Hobby Lobby today for $3 with my coupon.

This is what you will need:
-Chalkboard paint
-A jar of your choice
-Paint brush 
-Painters tape


First tape off the area that you want to be a the chalkboard.

Then start painting away! This is my first coat.

Second coat.

Third coat.

Then peel off the tape. When i did i had some get under it so i scratched it off with a razor.

There you go! 

Perfect for all my hot chocolate.

LinkWithin

Related Posts Plugin for WordPress, Blogger...